My Journey to Self-hosting and Bare Metal Server
I'm a tech enthusiast who loves to explore DevOps and Web development.
Hello everyone,
I hope you are all well. Today, I am excited to share my journey into self-hosting and my experience with bare-metal servers.
I have always had a passion for working with computers, particularly mini and microcomputers. This hobby and enthusiasm eventually paved the way for my career in DevOps, allowing me to delve into fascinating concepts such as self-hosting, system debugging, and tinkering.
So what is Bare Metal and Self-Hosting?
Self Hosting
Self-hosting means running your software or services on your infrastructure instead of relying on third-party providers. It offers control, privacy, and customization but requires technical expertise and maintenance.
Bare Metal Server
"Bare metal" in terms of servers refers to physical servers without virtualization, offering high performance, isolation, full control, and customization but potentially with longer provisioning times and higher costs.
Raspberry Pi
My journey began with a Raspberry Pi 3, which I pushed to its limits. I started by hosting my own personal website on the Pi from the comfort of my home and eventually progressed to running a Kubernetes cluster.
Things I have hosted in Raspberry Pi so far
Transmission [Remote Torrent]
Kubernetes Cluster [ With 3 Pi ]
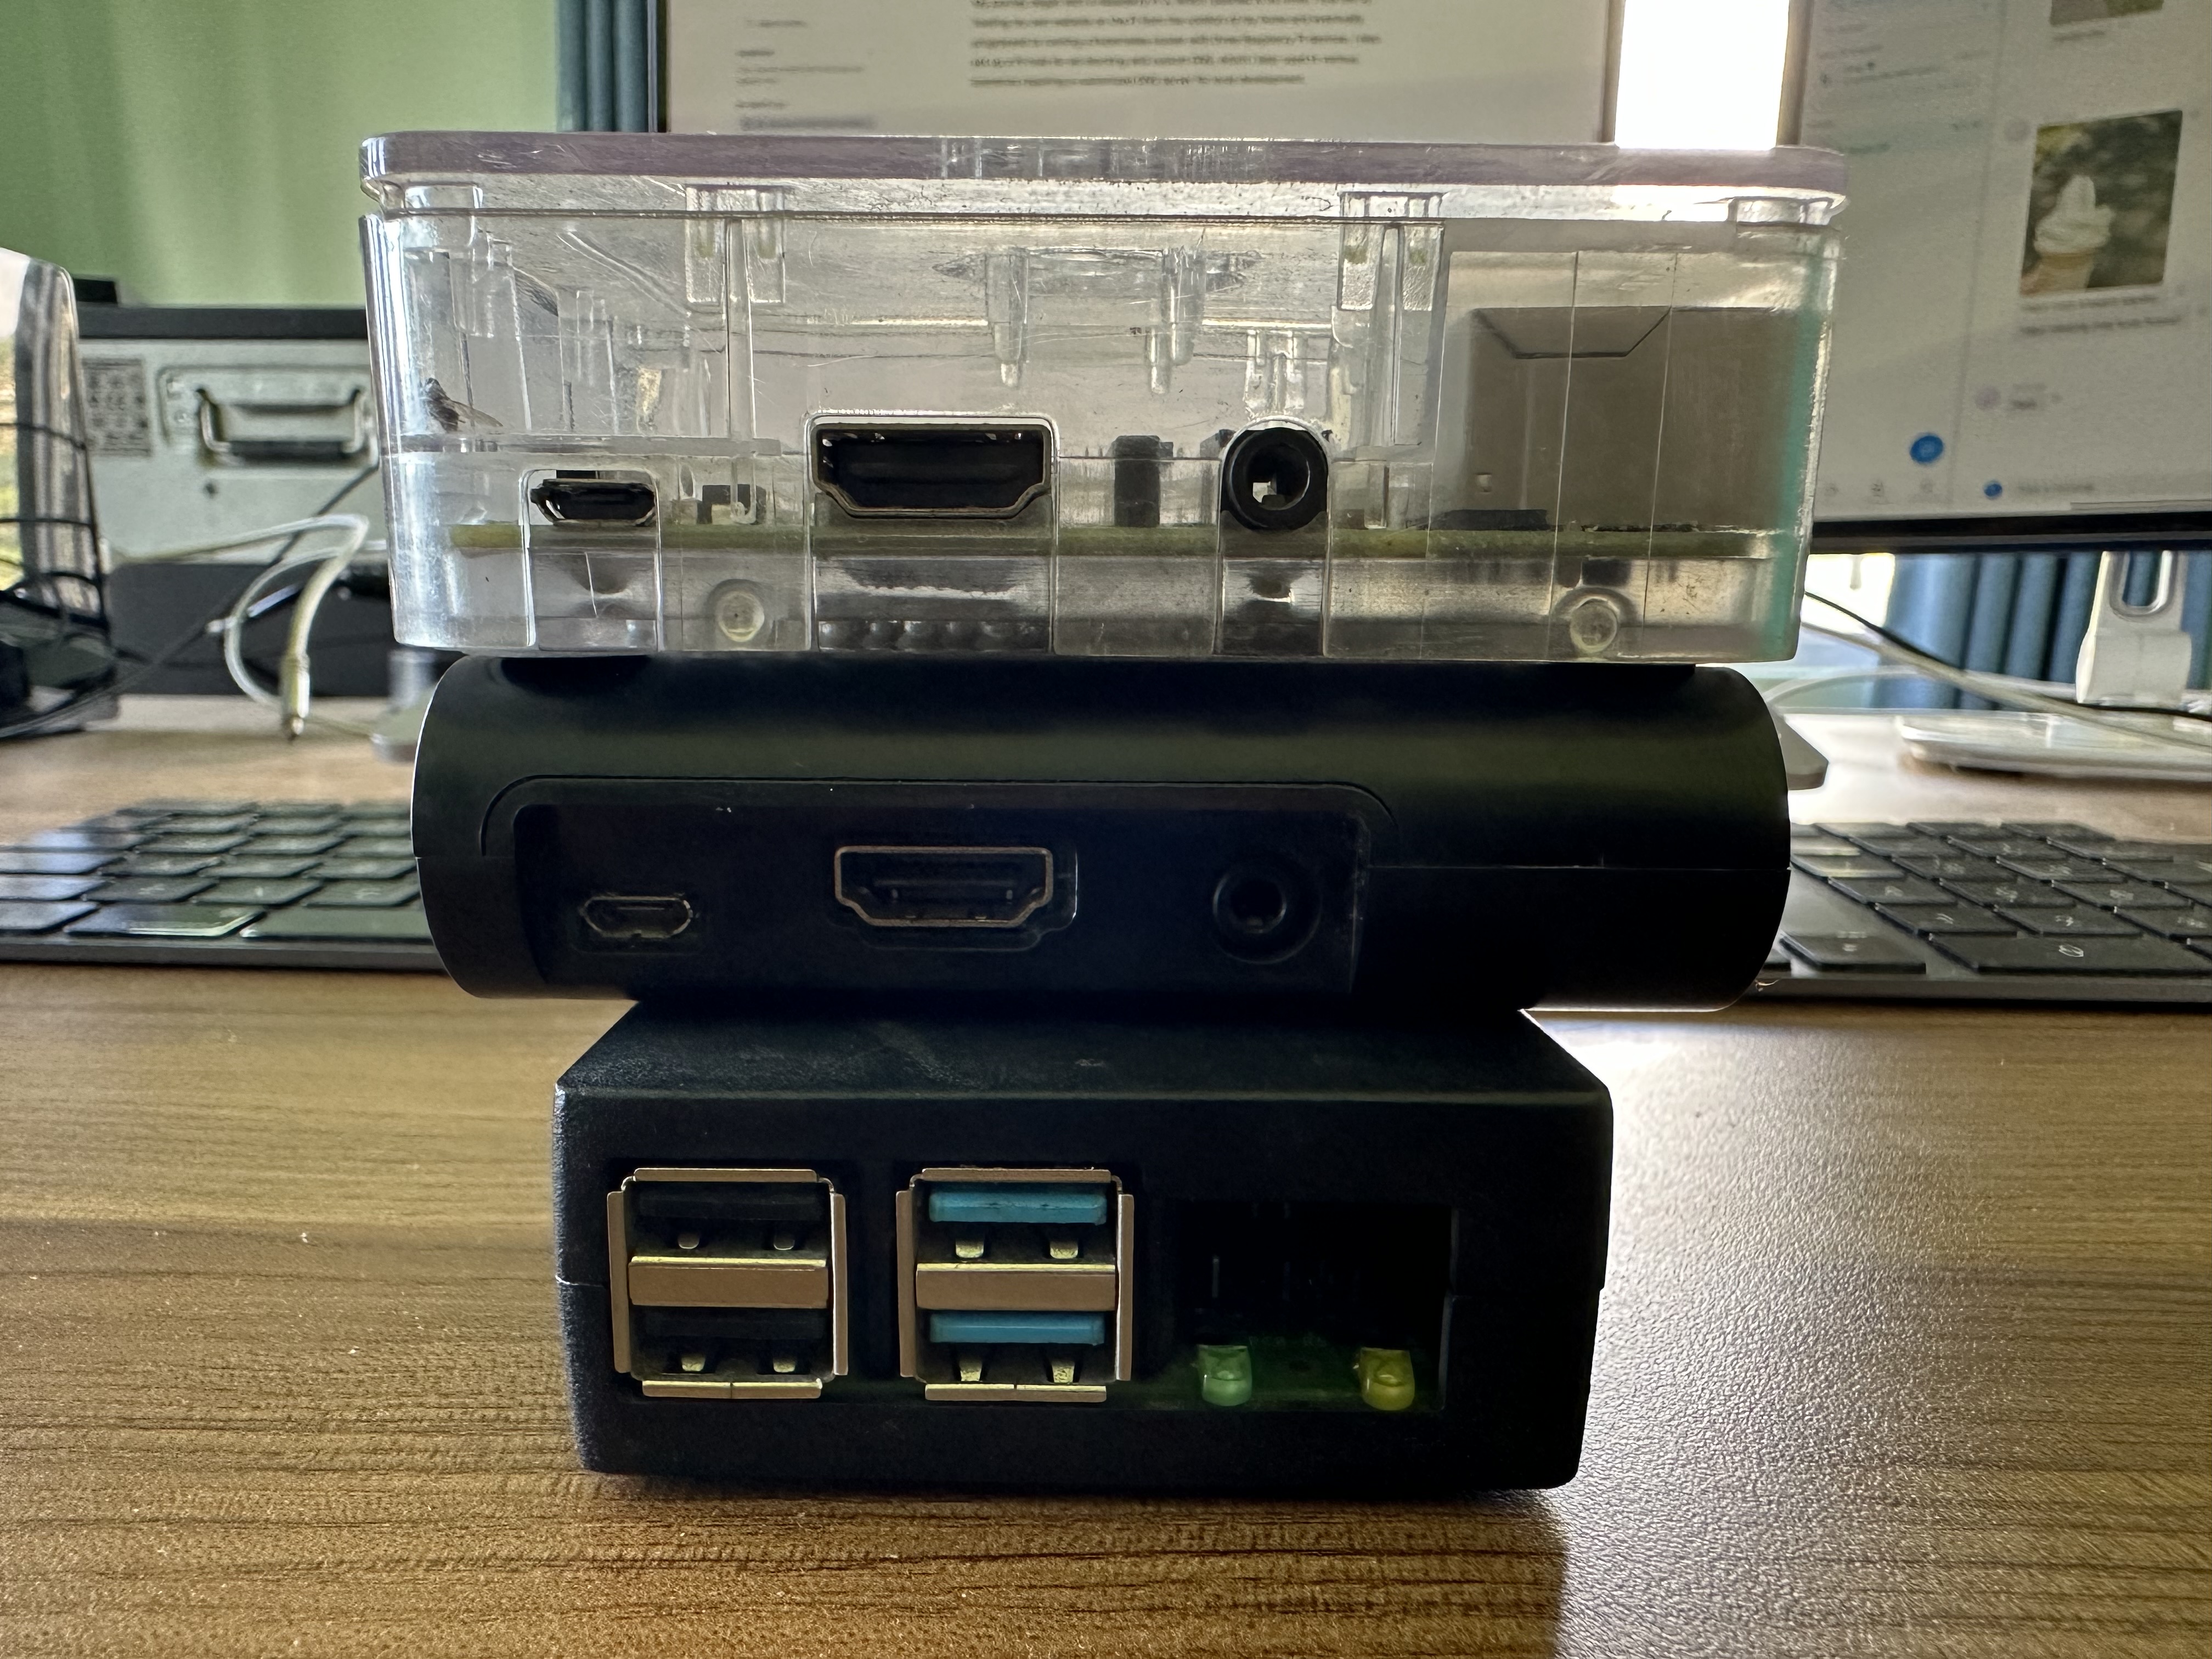
Image of Raspberry Pi 4 and 3
My journey took a turn when my Raspberry Pi 4 sadly met its demise. This experience taught me that not all mini PCs are as durable as larger machines. Consequently, I shifted my focus toward running a bare-metal server. After much contemplation, I decided to purchase a second-hand HP ProLiant M350p.

Note: Raspberry Pi should not be used for critical systems, it is not durable.
Bare Metal Server
Spec:
Model: ProLiant ML350p Gen8
CPU: Intel Xeon E5-2630 0 (24) @ 2.800GHz
GPU: 01:00.1 Matrox Electronics Systems Ltd. MGA G200EH
Memory: 16GB (expandable to 922GB)
I was thrilled to receive this substantial machine, equipped with two CPUs and ample options for RAM and HDD upgrades.
While I did encounter a few hiccups and broke things along the way, including accidentally damaging the hardware array during a cleaning process, I learned valuable lessons. Most of these issues turned out to be simple wiring problems that I was able to resolve.
Things I learned from hardware failure
Cache module LED status, motherboard switch placement
Proper firmware update via HP SSP pack
Need Windows or Centos for updating firmware from OS
Proper wire connections


Images of HP Proliant M350p.
OpenWrt
I gained some networking expertise by experimenting with custom router OS [OpenWrt] on my TP-Link router.

Image of current Tp-link with OpenWRT Dashboard.
Things I did with OpenWrt
Wireless to Wireless internet connection [no wire connection on WAN port for internet]
Custom DNS for Private IP
Wifi repeater
PXE network boot setup
I'd like to share a few thoughts about OpenWrt:
OpenWrt is an absolutely fantastic operating system for routers. It opens up a world of possibilities by allowing you to install a wide range of utilities and advanced features. Whether you need VLAN support, wireless client and server modes, or even the ability to run WiFi in monitoring mode (for various purposes, including security testing), OpenWrt has got you covered. It also supports essential services like SSH and FTP servers, making it incredibly versatile.
However, there's one caveat to keep in mind. To fully take advantage of OpenWrt's capabilities, it's ideal to have a router with ample storage space or a USB port for storage expansion. This allows you to make the most of this powerful router operating system and all the features it has to offer.
Exposing to internet
Exposing my self-hosted application to the internet was a challenging task, primarily because there was no public IP available on my home connection. To overcome this limitation, I had to take a detour and employ various methods, including reverse tunneling.
I delved into the world of reverse tunneling with a VPS to expose servers hidden behind NAT routers. Additionally, I explored tunneling through Cloudflare, making it much easier to expose my servers to the internet. I even posted a blog about reverse tunneling separate blog post here.
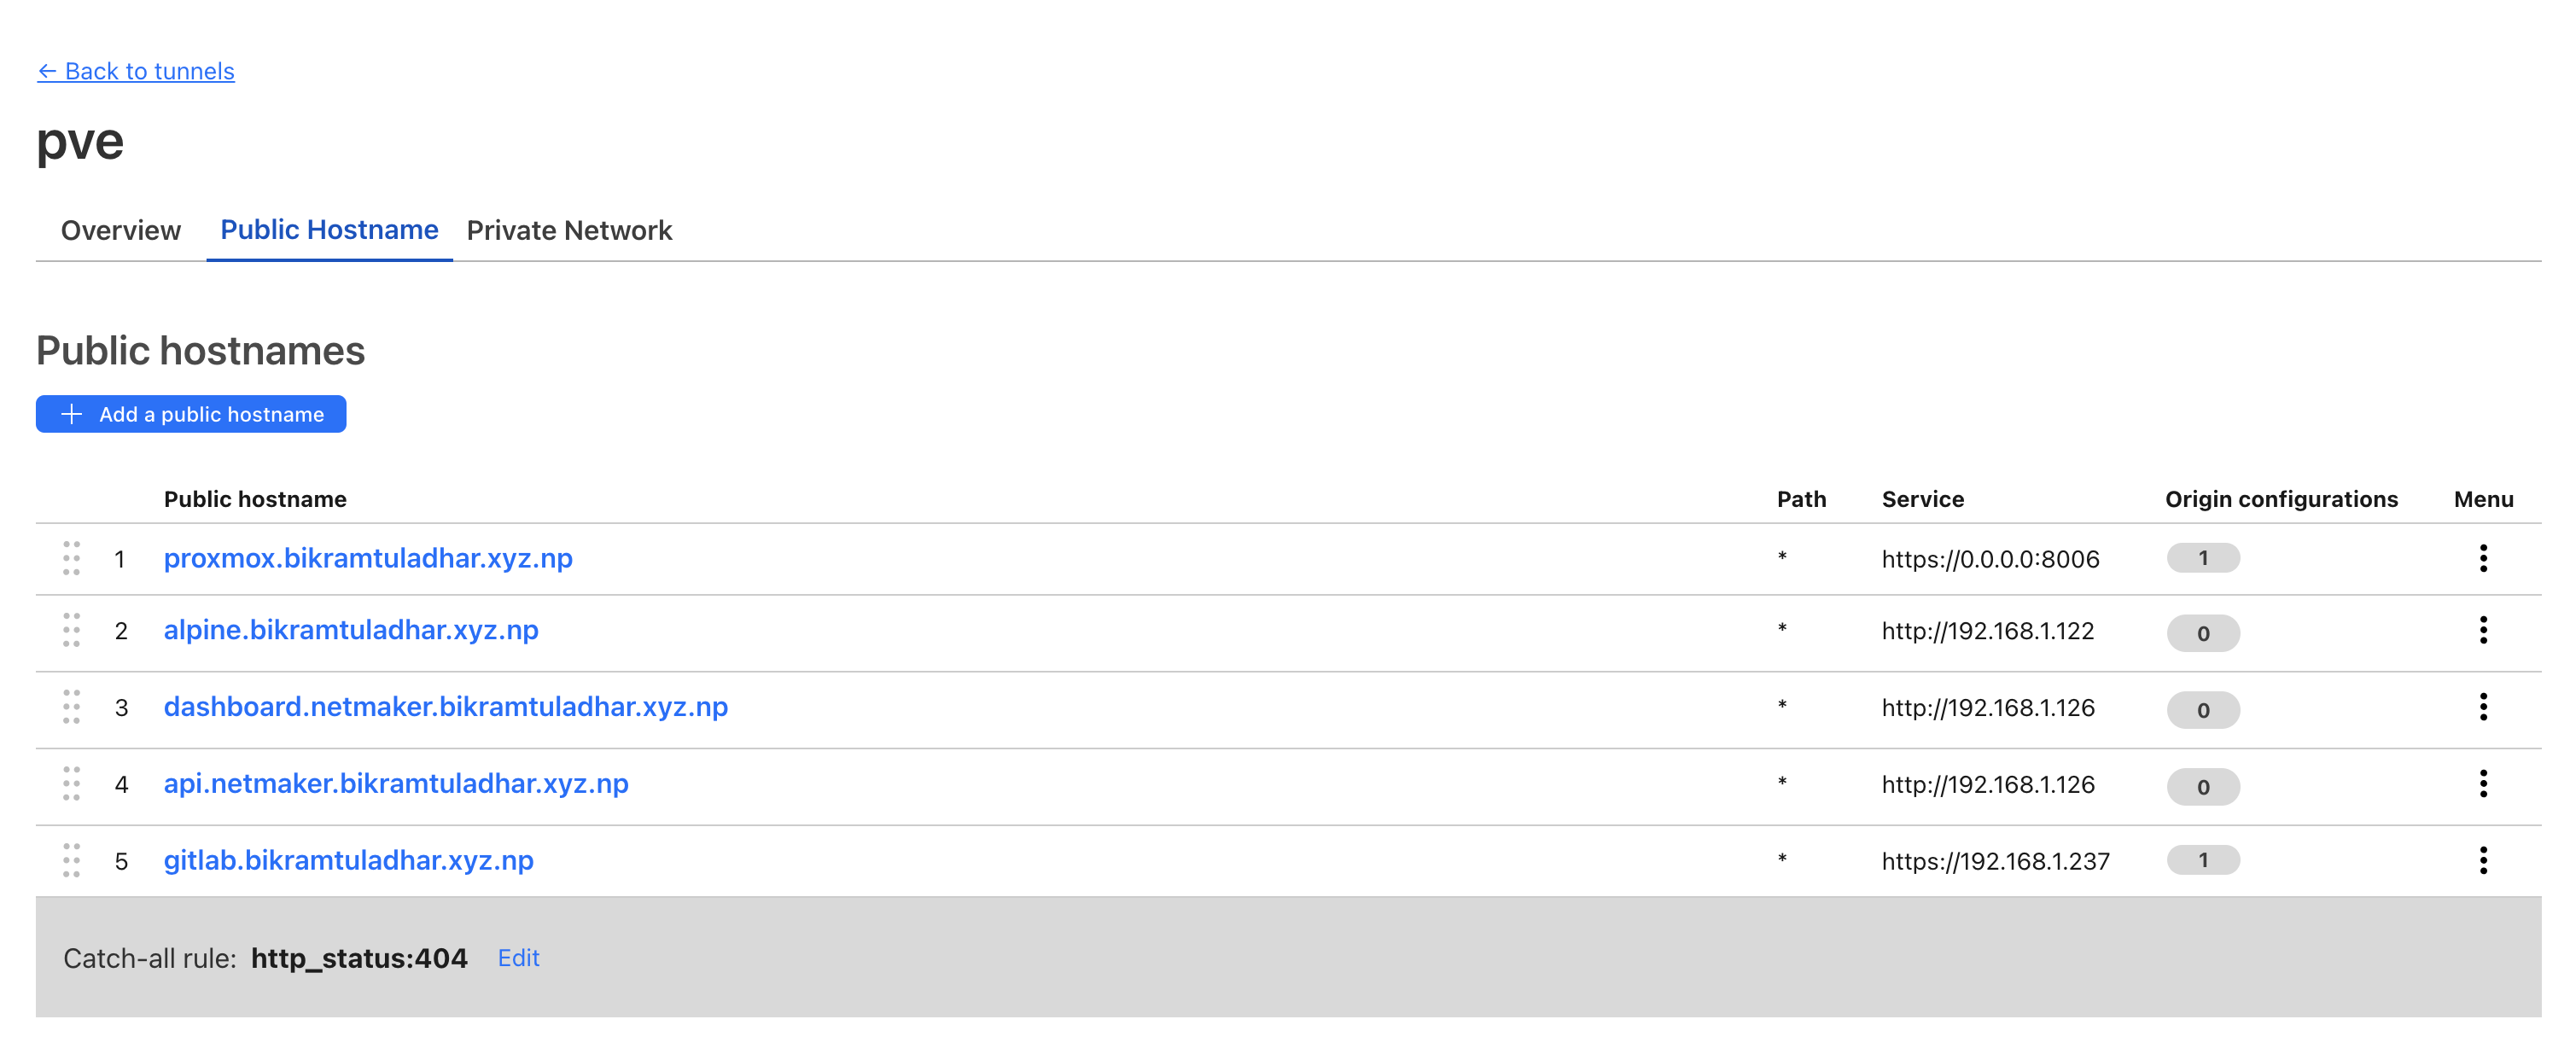
Cloudflare tunneling at work to tunnel my server to the internet.
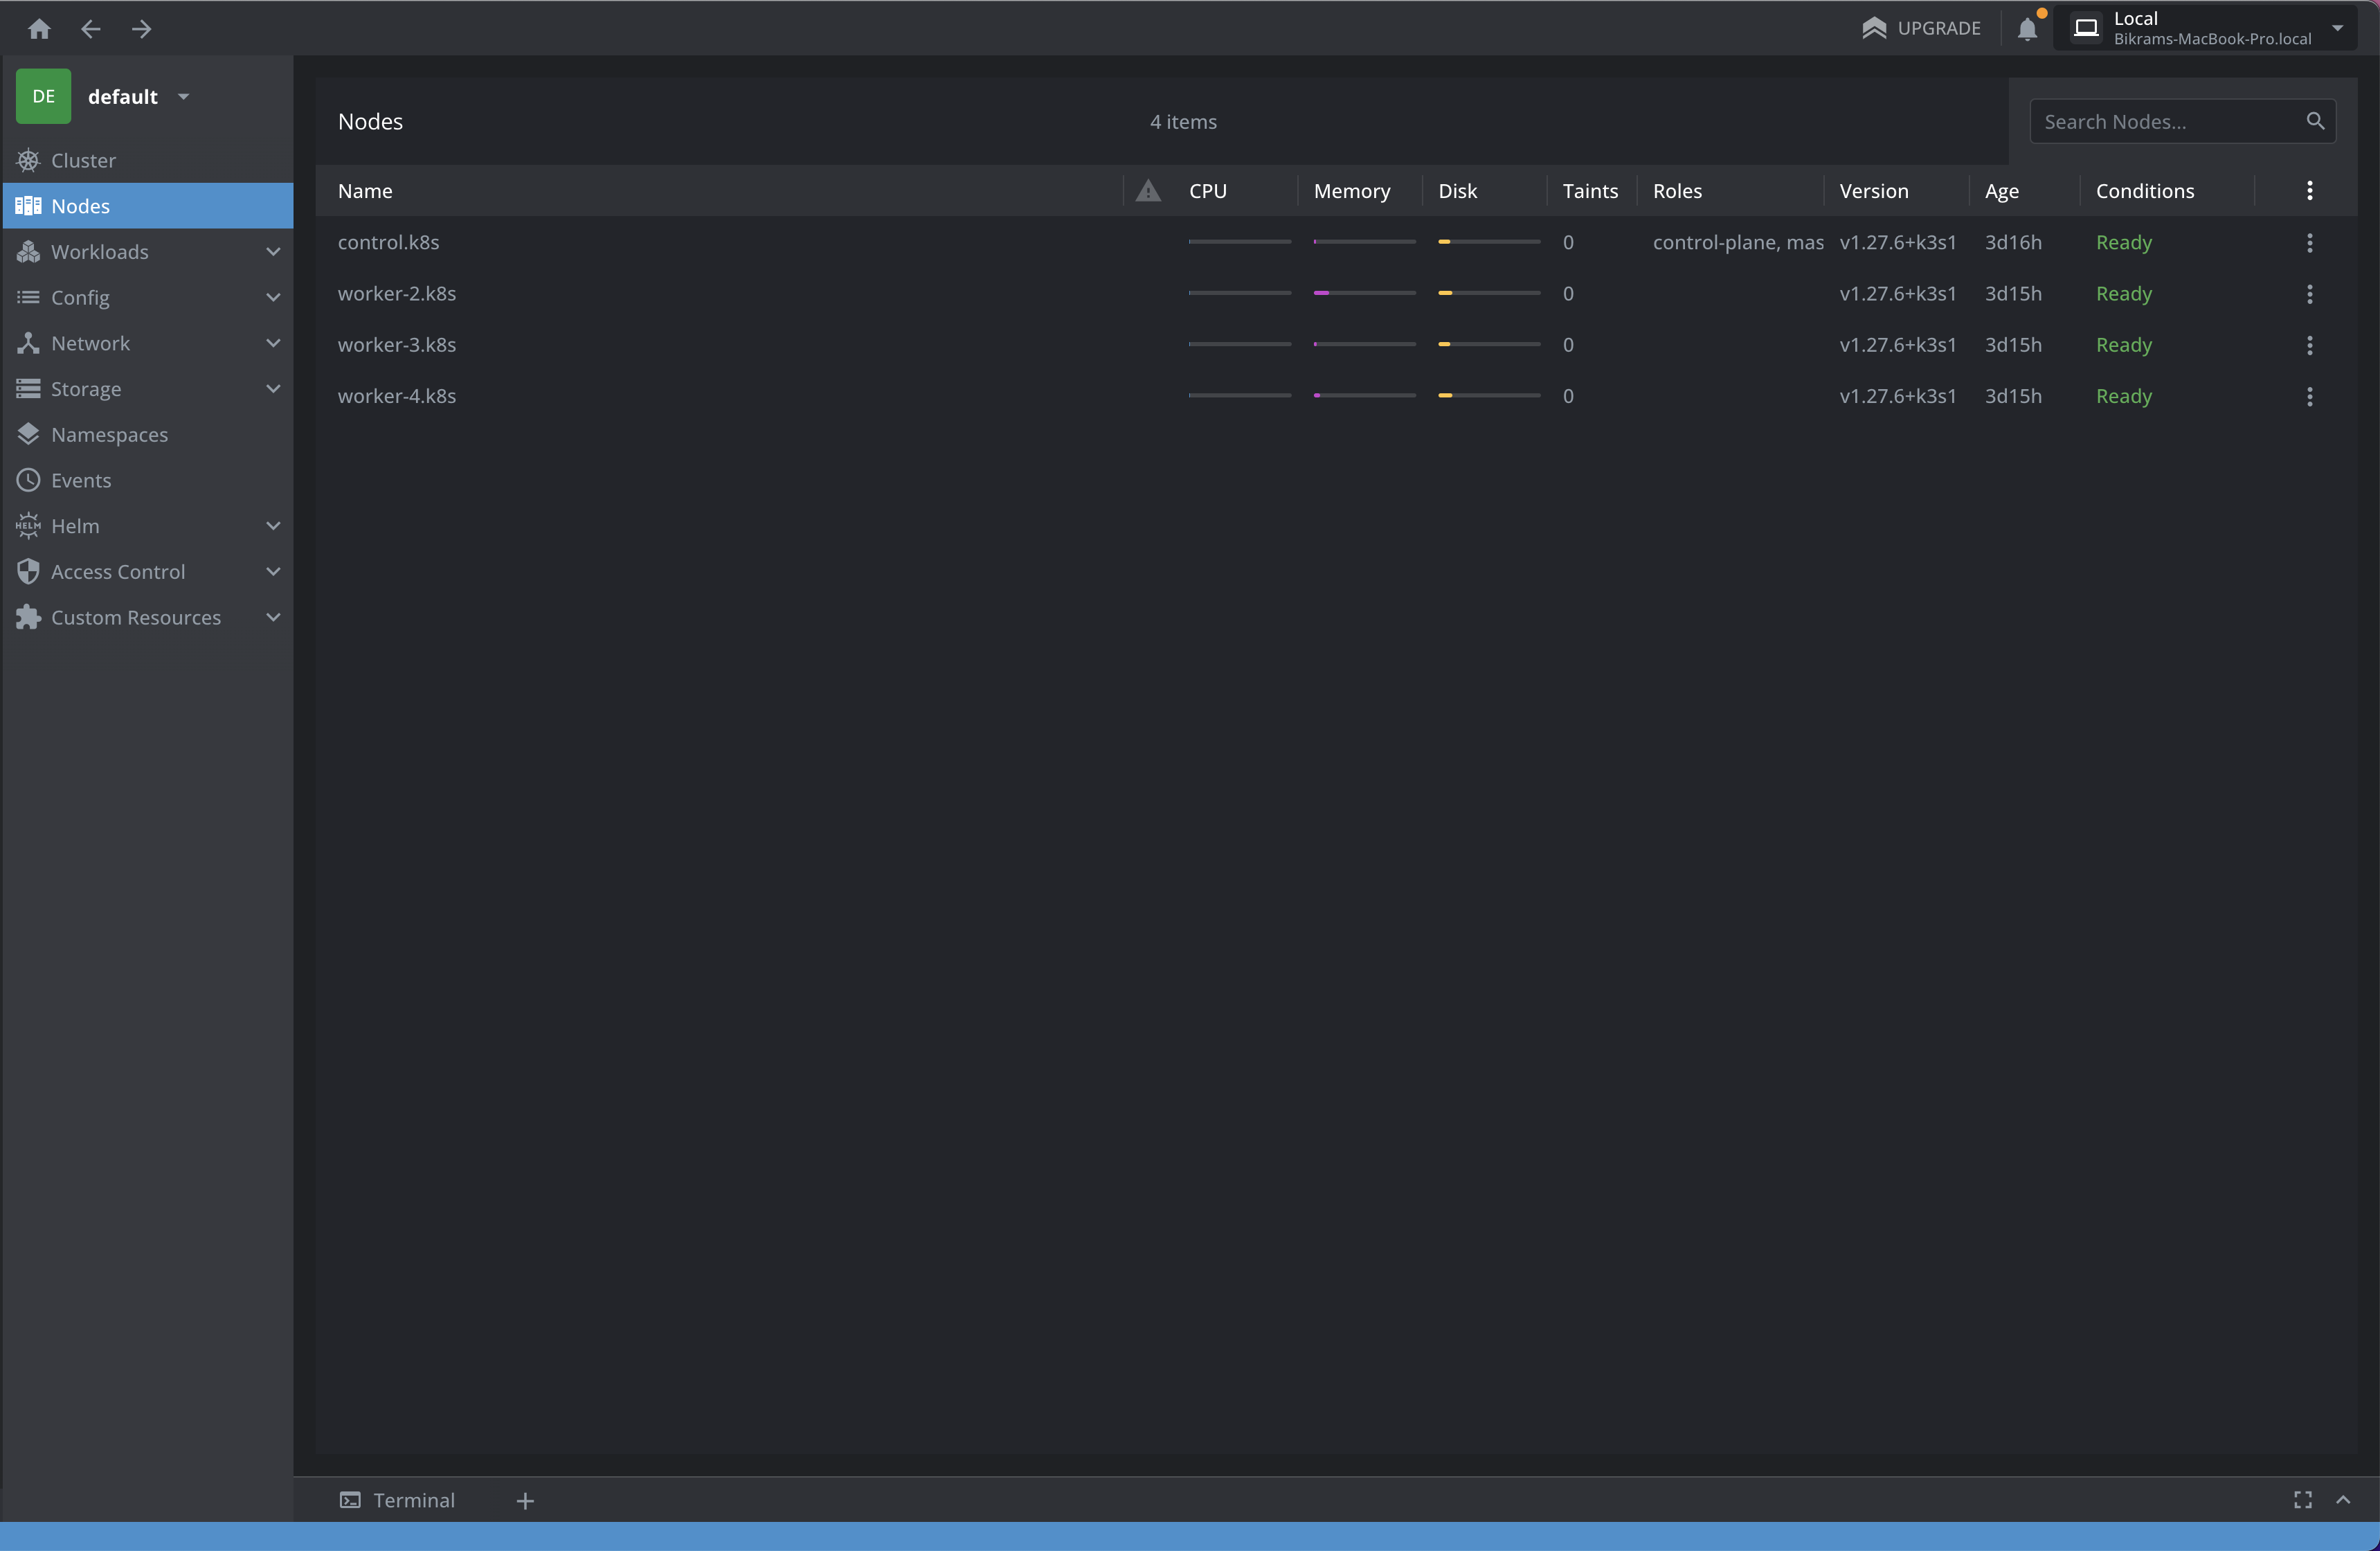
Self-hosting application in K8S
Now, I am hosting a Kubernetes cluster, GitLab, and my private VPN (using Netmaker), and I have plans to host Home Assistant for managing my IoT switches, among many other projects.
PS: I am using Proxmox for virtualization by the way.
In conclusion:
Exploring the world of self-hosting and tinkering with bare-metal servers is undeniably a time-consuming endeavor, but it's a hobby that brings both enjoyment and valuable learning experiences. Throughout my journey, I've made several noteworthy discoveries:
Public IP: It's easier to expose self-hosted from public IP but if you don't you can use Cloudflare tunneling or reverse tunneling.
DNS: Opting for Cloudflare DNS has proven to be a solid choice for reliable and fast domain name resolution.
Tunneling: Whether it's utilizing Cloudflare tunneling or setting up a straightforward SSH tunnel through a VPS with a public IP, both methods have proved effective for exposing servers behind NAT routers.
VPN: I've found that Netmaker and a bare WireGuard mesh are dependable choices for securing my network and ensuring privacy.
Hardware: It's surprising how durable old mini PCs can be. Investing in one can lead to a wealth of opportunities and capabilities.
Router: Instead of purchasing expensive Cisco switches, I've found that any router with OpenWrt can fulfill most networking needs, making it a cost-effective and versatile choice.
Wireless keyboard and mouse: Having a wireless keyboard and mouse on hand can be incredibly useful, especially when managing servers in challenging or remote locations.
In the world of self-hosting and server tinkering, the journey is long and sometimes challenging, but the rewards of fun, learning, and enhanced control over your digital environment make it all worthwhile.